Saturday, 13 June 2015

Renaissance Lute, chapter 3 - The shell

December 2011 - February 2012

While moving away from the parents' house (with a workshop in the basement, garage, &c.) into a city flat, I had to rethink my way of working, more quietly and using less space. Fortunately Roy Underhill &Al. crossed my path on the web and taught me the power of unpowered tools. So now, I can happily work with a baby sleeping in the next room.


Here's an example of space management, taking advantage of the third dimension, and multiple-usage devices. I stack up workbenches. The planing desk sits on top of the saw bench (which serves as a simple bench as well) that stands on the table.

The spacers, thin fillets of contrasting wood between the ribs are cut by hand out of solid maple, planed to the correct thickness.


My planing desk is made out of a thick slab of particle panel wood, so that it's not likely to move when humidity changes, and remains flat. The plane is a Lie Nielsen 62 simply inserted upside down into the slot.


Rosewood bends easlily and regularly. Here the nearly finished rib lays on sanding paper, which is used to remove the planing marks.


Assembling the shell, glueing the ribs and fillets takes ages, when you only have a couple of hours per week at hand… Here's the 'traditionnal' sellotape method. No doubt it was used by the early lute makers.


Here's a rib marked for sawing.

My hot-glue setup. Hide glue, of course. I'm using a little travel iron placed upside down to heat the water in the metal cup, whose temperature is monitored by a cook's digital thermometer, and the glue is melting in an espresso cup. I'm only preparing very little quantities of glue at a time, as I can't manage to find time to work every day.


Finally, after over a month, the shell is assembled. That's a significant step in the build :-D !


Read next post : Cleanup

Friday, 29 May 2015

Renaissance Lute, chapter 2 - The ribs

December 2011

The first main issue, as a beginner amateur lutemaker, was to find suitable wood to build the shell. I went to the local wood dealer, and they happened to have some beams of brazilian rosewood, however not enough in one single piece. It will be two separate pieces...

The seller accepted somewhat reluctantly to bandsaw the beam into 3mm slices, but I guess it must have been the first time he was asked to do such a thing. He actually asked if I didn't prefer to purchase some very thin veneering wood... No thanks, that really wouldn't do.


The planing and scraping from 3+ mm down to 1.4mm took forever... (Today I own a machine - yet unused - to do that task!)


Naturally I needed some means to measure progress.  Those commercial callipers being so expensive, I decided I could simply buy the dial and build the rest around it. Very easy. The thumb wire-handle to lift the gauge is made out of one of those coat hangers you get from the laundry. That wire is quite stiff and works perfectly...

You might see on the next picture that the set of ribs originates from two different beams... See that difference in length? I tried to arrange the sequence such that the step between the two parts would not be noticeable...
The first rib is cut, ready to be bent!

Read next post : The shell

Friday, 22 May 2015

Renaissance Lute, chapter 1 - The Mold

The year is twenty-eleven AD. I participate to an instrument making workshop that takes place in the castle of Gruyères. In a small team of amateurs, under professionnal supervision, we build a beautiful renaissance harp. (I may come back to that some time later...) During one of the concerts of this early-music event, a lady approaches me and tells me about lending me a box containing detailed instructions to build a lute, written by some englishman, who uses all sorts of unexpected tools like sellotape, old electric irons, cooking pans, mad cow skin and toilet paper to make said lutes...

As I discover later on, when I actually receive the box, the englishman turns out to be David Van Edwards, who is not to be presented anymore to anyone interested in lute making. And the box is this. I read through the instructions and start to realize that the whole thing is actually doable! So I set out to find some suitable wood and assemble the missing tools. Some nine month later, it will eventually look like this :


But for the moment, all is yet to be done.
November 2011.


The first part is the construction of the mold, following the plans.
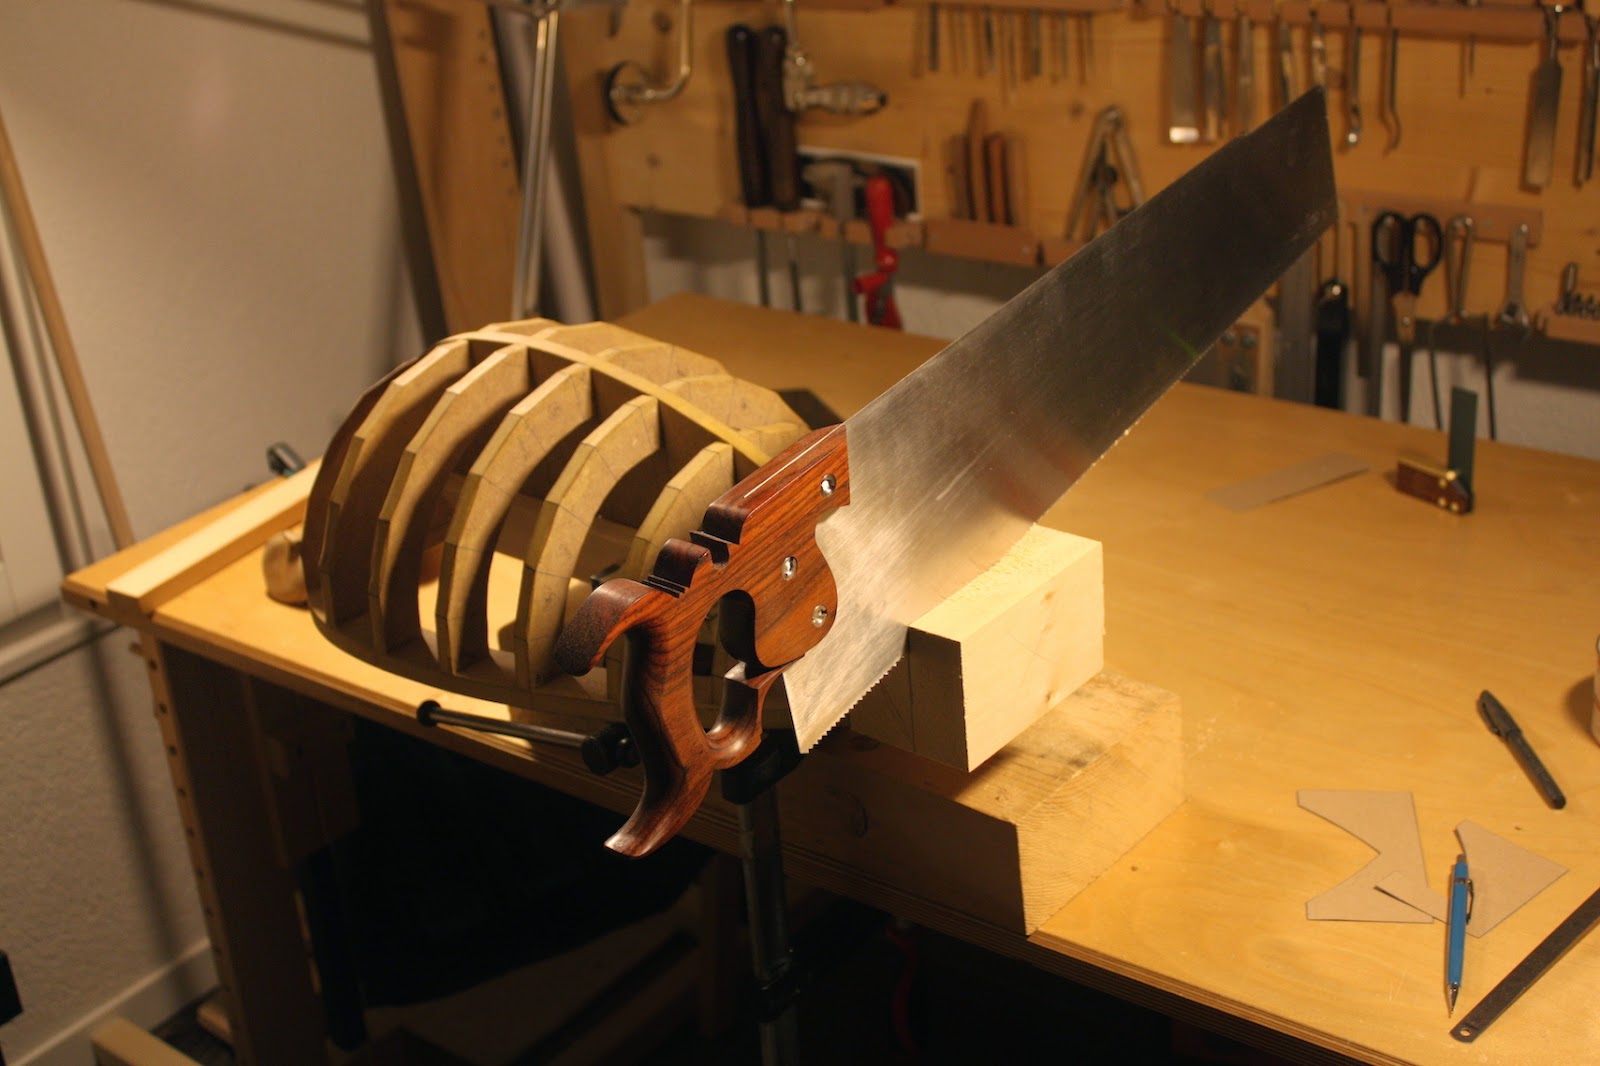
 I'm using a home-made saw to cut the curves out of the MDF, having no bandsaw at home. But it works perfectly fine.

 The mold is made of faceted ribs, to be cut out as accurately a possible.
 Once all assembled, the neck block is screwed to it and sawn to size. Mine was made of linden (basswood) as I had leftover from carving wood.

By the way, that big panel ripsaw is handmade from Two Lawyers Toolworks and works great.


I made an adapter for my photo-tripod in order to hold the lute, at any height and any tilted position. Very handy to be able to put it out of the way when needed!

Now, the actual work on the lute can begin...


Saturday, 16 May 2015

So, let's start !

Well, how to begin ? Par où commencer ?
This will be yet another web log, mostly about the late-evening woodworking that happens in a room of a city flat in Lausanne, Switzerland, after my day job as a software engineer. How exciting is that! Keep calm, and resume reading.


More specifically, this blog will serve as a replacement for my ex-website www.sculpture-bois.ch (someone bought the domaine name and turn it into an online shoe-shop... why?) and there will be things about, as said, woodworking, woodcarving, lute-making, and other-but-not-so-different things too. (I will however not say a word about the proper way to remove the curve from a banana, nor about how to put toothpaste back into the tube).

The focus shall remain set on the usage of traditionnal hand-tools, as opposed to noisy and dusty power-tools.

So, I officially beak a virtual champagne bottle on this log and declare it open.

I hope you'll enjoy the visit, and please leave an occasional message if you feel like it!

Read next post : Starting the renaissance lute